GIMP is a comprehensive image editing program on the level of Photoshop, in fact it looks and works pretty much the same as Photoshop, with one major exception; Photoshop costs about $800.00 while GIMP is totally free! It can be downloaded from GIMP for Windows.
GIMP is a powerful full-image processing application, and like all powerful applications, its complexity may seem intimidating to inexperienced users. However, you can quickly perform some common basic operations, like crop, flip, or reduce the file size of images without spending the time to completely learning every function of GIMP. This article will focus on how to scale an image.
First let's answer the question; why would you want to re-scale an image? When you use your WYSIWYG webpage designer it lets you resize the image automatically. When you use your WYSIWYG publishing program it lets you resize the image automatically. Well, that's not exactly true. What your WYSIWYG applications are actually showing you are basically illusions.
Your webpage design application sets the image width and height in an html img tag. This causes the image to be displayed by the users web browser in the size you desire, but the original oversize image still has to be transferred from your website to the users web browser. This makes the webpage load slowly.
Similarly, your publishing program lets you set the size that the image will be printed, but the original oversize image is still embedded in your document. This makes the file size larger. So you want to re-scale the image to correct size outside of your WYSIWYG publication.
• To open an image in GIMP, In the Main Toolbox File menu select Open.... In the the Open Image dialog box that appears, navigate to the image file and select the image file name, then click on the [Open] button.
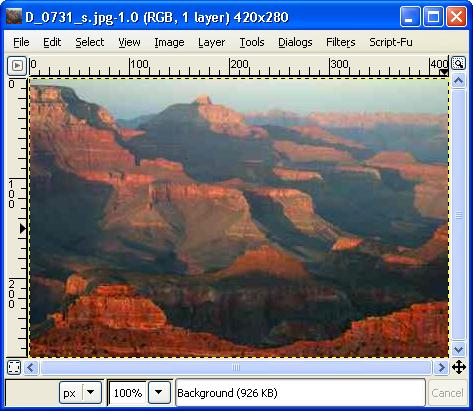
The image shown here is a National Park Service photograph of the Grand Canyon.
In the Image window's Image menu, select Scale Image.... The Scale Image dialog box will appear.
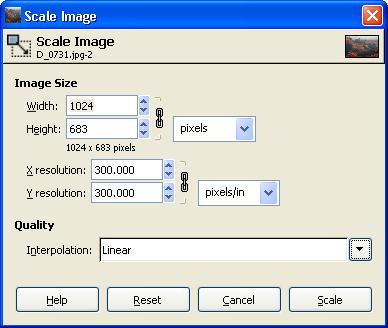
In scaling an image we have two main uses to consider. If you are scaling the image for display on a computer screen or on a webpage, you need to think in terms of pixels. In the Scale Image dialog box, make sure Pixels is selected in the top drop-down list, and then simply enter to your desired Width: and height: in the input boxes.
• If the chain icon next the Width: and Height: input boxes is unbroken, then changing the Width or Height will cause the other dimension to automatically change to maintain the same aspect ratio. Click on the chain icon to break the chain and allow the Width or Height to be adjusted independently.
If your scaling the image for printing, you need to think in terms of resolution. In the Scale Image dialog box, select a physical dimension, for example inches, in the top drop-down list. In the bottom drop-down list, select a scale units, for example pixels/in. Then set the X resolution: and Y resolution: to the resolution of the target printer. Then set the Width: and height: input boxes to your desired size.
• It can be difficult to understand the concept of pixels relative to resolution. You have to visualize an image file as an array of dots. Each dot is actually a code that defines the color for that specific dot. An image in a disk file has no inherent size. The size at which it will be displayed depends upon the resolution (dots per inch) of the display device.
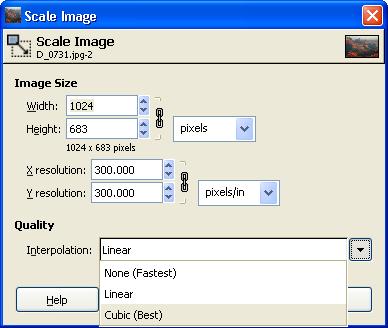
At the bottom of the Scale Image dialog box is the Interpolation drop down list. If you are decreasing the size of the image, you can ignore this list because GIMP will be removing pixels to make the image smaller. If you are increasing the size of the image, you can choose one of three methods GIMP will use to create fill-in pixels to make the image larger.
The None interpolation method simply duplicates pixels. This will make the picture less sharp, but it's fast. The Linear interpolation method uses the color of adjacent pixels to determine the color of fill-in pixels. This provides good results.
The Cubic interpolation method uses the color of more of the surrounding, pixels and performs a more complex calculation to determine the color of fill-in pixels. This is the best method, but its a slow process.
When you have completed your settings, click on the [Scale] button. To save the scaled image select, in the Main Toolbox File menu select File Save as.... In the Save Image dialog box enter a different file name so that you don't over-write your original image file (in case you need it again). Then click on the [Save] button.
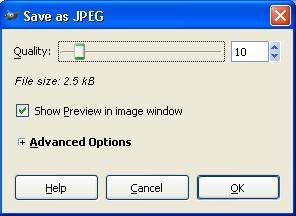
If the image is a JPEG, the Save as JPEG dialog box will appear where you can set the quality (compression ratio) for the file. Set the "[] Show Preview in image window" check box and observe the image while using the mouse to move the Quality slide. If you set the slide to 100, the image will be saved with minimal compression, so it will be sharp but the file size will be large.
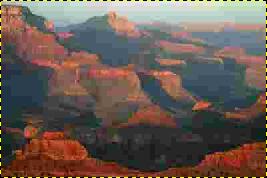
Visual anomalies caused over-compression.
As you move the slide to the left, the amount of compression will be increased, creating a smaller file size, but the image will not be as sharp. At some point you will note that the image has become unacceptably blurry. Move the slide back to the right until the image sharpness meets your minimum requirements. Then click on the [OK] button. The image file will be saved.
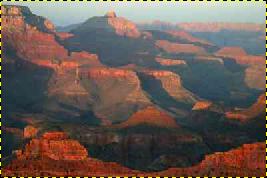
Correct compression reduced the file size by 70 percent with no noticable visual anomalies.
Like all powerful full-image processing applications, GIMP may seem complex and intimidating to inexperienced users. But this article shows that you don't need to completely learn every function of GIMP to perform the common operations like scaling an image.
More Graphics Design Tips:
• Image Scanning - Confused About DPI?
• Stop Motion Animation: Nine Creative and Easy Techniques
• Introduction to Draw SVG Free Online SVG Drawing Application
• Inkscape - How to Add a New Node
• SVG Example Code to Rotate Elements
• Inkscape Shadows and Highlights
• Coding a Matrice in MathML
• MathML Elements to Display Subscripts and Superscripts
• History of Type Development and Type Terminology
• Selecting Vertices Edges and Faces in Blender

