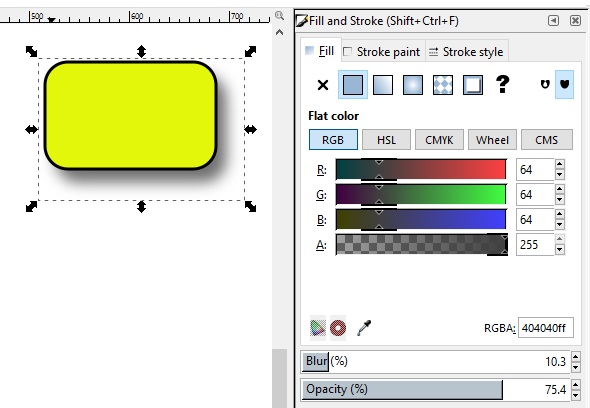
Adding shadows and highlights to your drawings can create a touch of realism. This can be accomplished by creating a copy of the object for which you want the shadow, filling that copy with a darker or lighter color, and positioning it in relationship to the original object.
In the example shown above, I removed the boarder of the copy by, in the Fill and Stroke dialog box, setting the Stroke Width to 0. Next, in the same dialog box, I set the fill color to gray. It's easy to create any shade of gray by using the RGB color bars to set red, green, and blue to equal (and low) values.
Then I set the Blur bar to 10% and the Opacity bar to 75%. Blur sets the width of the shadow object's "fuzzy" border. Opacity sets how much of the background shows through the shadow. In the real world shadows do not usually totally obscure the object that they fall upon.
The last step is to move the shadow to underneath the object that is casting it. In with the shadow object selected, in the main menu select Object | Lower to get the shadow under the object.
All of these parameters; blur, opacity, and relative position can be adjusted to get the exact effect that you desire.
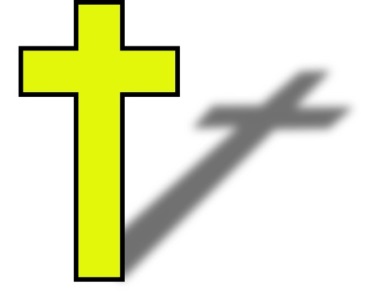
The example above shows what you can do with a shadow using perspective. To create this shadow I used the same steps as before, except this time I rotated the shadow object and then used the Edit paths by nodes tool (in the toolbox) to reshape the shadow object to give it a perspective look.
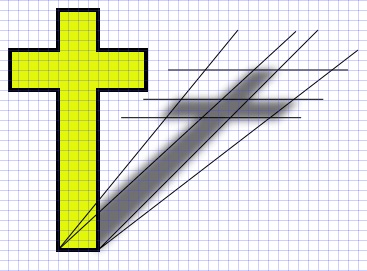
In the picture shown above, I have placed construction lines to aid in showing how I reshaped the shadow object to give it a perspective look. It helps to display the grid. To display the grid, in the main menu select View | Page Grid.
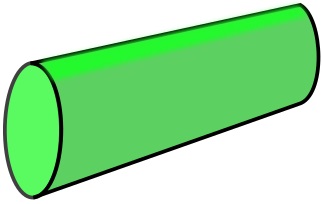
Shown above is an example of highlighting. A highlight is a bright reflection off the surface or a corner of an object. A highlight is the same as a shadow except that its color is lighter than the surface of the object receiving the highlight, and you usually place the highlight up on the object rather than below it.
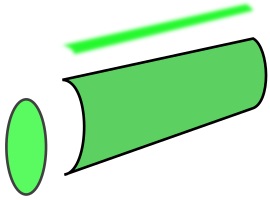
Shown above is an exploded view of the highlighted cylinder. Note that it is composed of three parts, an ellipse, a shape created using the Draw Bezier Curves and Straight Lines tool, and another shape used for the highlight. The highlight is created using similar steps as a shadow, set the path width to 0, set the blur, and possibly set the opacity.
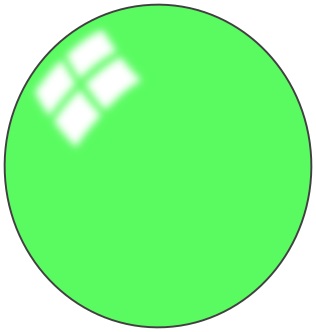
Shown above is a sphere with highlighting. This time the highlight represents the reflection of a window. For greater realism, I would put a shadow on the right side of the spere and another shadow underneath.
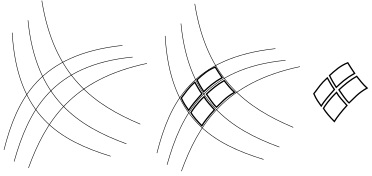
Shown above is how I constructed the highlight for the sphere. First I drew some construction lines. You could use more geometrically accurate construction lines, but I just winged it. Then I drew the window panes within the construction lines. Then I removed the construction lines. Then I applied the same settings to all the windows panes as with any highlight; set the stroke width to 0, set the fill color, set the blur, position the highlight on top of the sphere.
If the sphere used a textured fill, or it had some other visible features on it, you would want to set the the highlight's opacity to let that show through.
More Graphics Design Tips:
• What is the Pantone Color System?
• Inkscape Exercise: Draw Photorealistic Sphere
• The Blender Gamekit
• Draw Bezier SVG Drawing Application
• MathML Element to Display a Fraction
• Inkscape: Combine the Paths of Multiple Shapes
• Five Surprising Reasons I Use Krita for Photo Editing
• RGB Vs CMYK
• Inkscape Shadows and Highlights
• The Game Maker's Apprentice

