The Windows Indexing Service provides you with the ability to perform advanced searches on directories located on your computer and on shared directories on the network. The Indexing Service was introduced with IIS (Internet Information Services) and is now installed with Windows 2000 and Windows XP.
The Indexing Service is not started by default on a Windows 2000 professional computer. If you want the Indexing service to start automatically, select Start | Settings | Control Panel | Administrative Tools and open the Computer Management application.
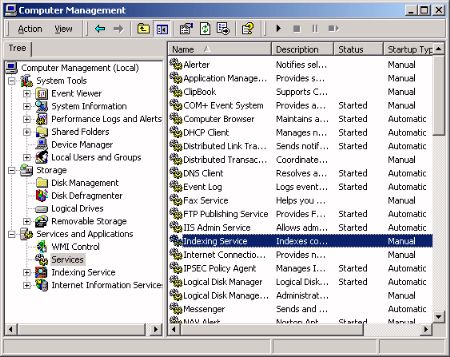
In the right pane of the Computer Management window, click on Services and Applications, then click on services. In the list of services, right-click on Indexing Service, The Indexing Services Properties dialog box will appear.
In the Indexing Services Properties dialog box, on the General tab select Automatic from the Startup type: drop-down list.
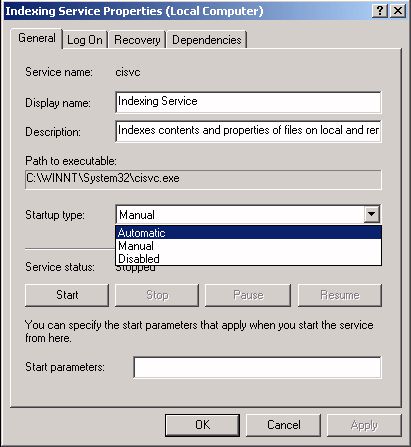
Under Service stautus: click on the Start button. A flurry of hard disk activity may begin as the Indexing Service builds or updates the index. The Indexing service creates an index (also called a catalog) organized in a way that makes it quick and easy to search. The Indexing Service also records the documents properties, for example its date of creation and last modified date.
The Search application can be accessed by right-clicking on any folder and selecting Search... in the popup menu. You can search for file names or you can search for text within files using keywords, or phases. Queries can use wildcards (?, *) and boolean operators (AND OR and NOT). When a user searches an NTFS volume, the Indexing service will return in the results only the files the user has permission to see.
The documents created by most applications contain formatting and control information, for example a webpage contains html tags, a Word document contains rtf tags. The Indexing Service uses filters to extract the content from the formatting and control information. Documents with extensions for which filters are not installed will not be indexed by default.
If you want to index everything, in the left pane of the Computer Management window expand the Services and Applications branch, then click on Indexing Service. In the right pane, right-click on system.
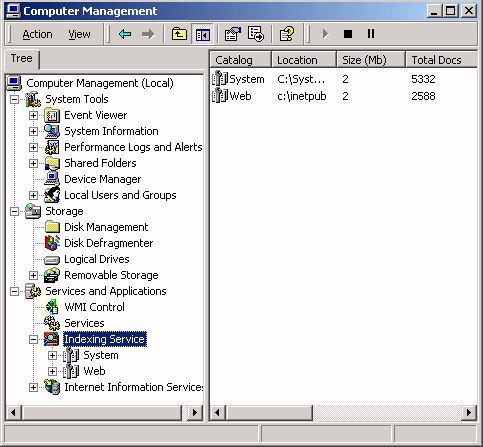
- If Internet Information Server (IIS) is installed a second index named Web will appear.
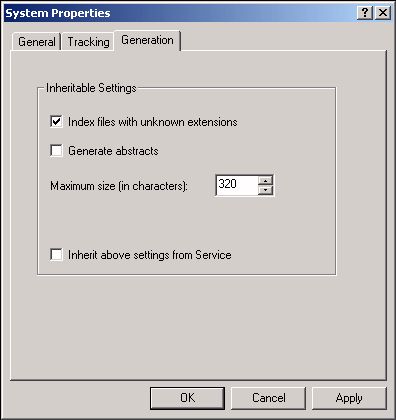
In the properties dialog box that appears, select the Generation" tab. On the Generation tab, clear the check box Inherit above settings from Service, and set the checkbox Index Files With Unknown Extensions.
The Indexing service is designed to run continuously and requires no maintenance. After it is setup, it will automatically update the index. When a file changes, the OS sends a change notification to the Indexing Service, causing it to update the index. Folders on remote computers are scanned periodically.
The Windows Indexing Service uses a fair amount of disk space (approximately 30% the amount of the original files). If the shared directories on the network are large, it can consume a considerable portion of the computer's memory and processor cycles. There are several options for configuring the Indexing Service to improve performance.
To configure the Indexing Service, in the left pane of the Computer Management window, expand the Services and Applications branch, then right-click on the Indexing Service icon. In the popup menu, select All Tasks | Stop to stop the Indexing Service. Then select All Tasks | Tune Performance". The Indexing Service Usage dialog box will appear. (Don't forget to restart the Indexing Service after you have configured it.)
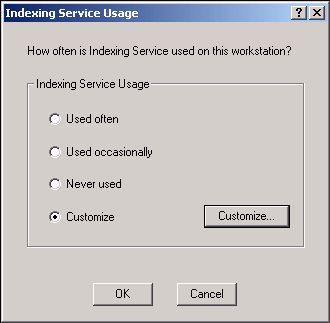
The Indexing Service Usage dialog box provides three radio button options that let Windows set the Indexing Service Performance for you; Used often, Used occasionally, and Never Used. If you want to provide your own custom setting, set the Customize radio button and click on the Customize... button. The Desired Performance dialog box will appear.
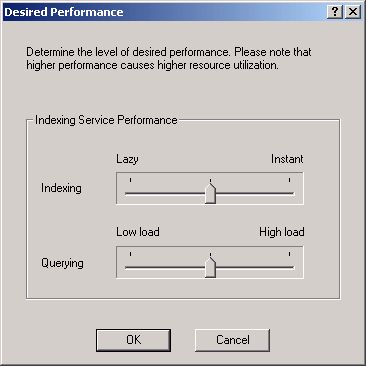
The Desired Performance dialog box contains two slider controls. The Indexing slider control sets how quickly the catalog will be updated. Adjust it to the left to reduce the amount of system resources used to update the catalog. The Querying slider control sets how quickly search results will be returned. Adjusting it to the left will reduce the amount of system resources used, but search results will take longer to return.
You can also control the Indexing Service by configuring the specific folders to be indexed. In the left pane of the Computer Management window expand the Services and Applications branch, then click on Indexing Service. In the right pane, double-click on the system catalog. This will display three folders, Directories, Properties, and Query The Catalog.
To add a folder to be indexed, right-click on the Directories folder and select New | Directory in the popup menu. In the Add Directory dialog box that appears, enter the path of the new directory.
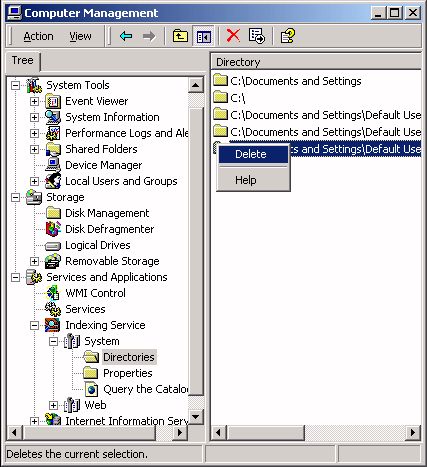
To remove a folder, left-click on the Directories folder to display the list of directories in the right pane. Then left-click on a directory and select Delete in the popup menu.
The Windows Indexing Service uses a fair amount of disk space and if the shared directories on the network are large, it can consume a considerable portion of the computer's memory and processor cycles. Using the methods described in theis article, you can configure the Indexing Service to improve performance.
More Windows Administration Information:
• Disable Windows 10 Automatic Updates
• Windows 7 Tweaks
• Computer Technician's Guide to Dealing with Customers
• Turn Off Windows 10 Snap and Shake
• What is Hyper-V in Windows Server 2019?
• Windows Event Logs for Maintaining or Troubleshooting Your PC
• Introduction to Windows PowerShell
• DOS Switches and Wild Cards
• How to Change Process Priorities in Windows Task Manager
• Firewall Rules


