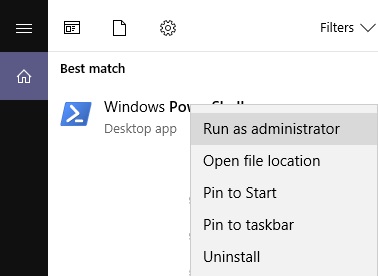
PowerShell is a more powerful replacement for the command shell. To run PowerShell, in the task bar Search box, type "powershell". In the menu that appears, right-click on Windows PowerShell, and in the menu that appears, select "Run as administrator". In the User Account Control warning box that appears, click on the [Yes] button.

PowerShell introduces Cmdlets. Cmdlets are instances of .NET Framework classes process input objects from the command pipeline deliver objects as output to the pipeline. Some useful Cmdlets are Get-Process, Get-Content, and Stop-Process. Below is an example of using the Get-Content Cmdlet to copy a list of files from one folder to another.
At the PowerShell prompt you may want to type cd / to get to the C:> prompt which allows using full paths which makes things easier. Then at PowerShell prompt type the following command:
Get-Content c:\path\filestocopy.txt | ForEach-Object {copy-item $_ c:\path\newlocation}
Where filestocopy.txt is a text file list of the files that you want copied, and newlocation is the name of the folder you want you files to be copied to.
The above command uses the pipeline character (|) to pass the output of the Get-Content command to the ForEach-Object loop command, which uses the copy-item command. You can use the pipeline character to add additional commands to the pipeline.
PowerShell Scripts
The real power of PowerShell is when you put commands in a script, which allows you to reuse the commands. However, because of the awesome power of PowerShell, it has security provisions called execution policies. So when you run your first script you may get an error that says scripts have been disabled on your system. This is normal behavior, in order to prevent malicious scripts from running on your system.

To run scripts, you'll need to modify the execution policy. In order to change the execution policy, open PowerShell as Administrator, and enter the following command.
PS C:\> Set-ExecutionPolicy Unrestricted
The system will prompt you to confirm the change. Enter the letter Y and press the [Enter] key to change the execution policy setting.
To create a PowerShell script open a basic ASCII text editor like Windows Notepad and type in the following comand.
(Get-WmiObject -Class Win32_ComputerSystem -Property Name).Name
pause
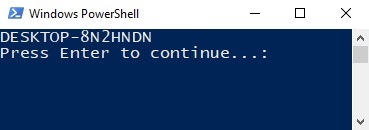
The above command uses the WMI (Windows Management Instrumentation) interface's Win32_ComputerSystem class to access the local computer's name. The pause command keeps the PowerShell windows open until you press the [Enter] key. Save the file extension .ps1 for example getCompname.ps1.

To run the script, right-click on the file name, and in the popup menu that appears, select Run with PowerShell.
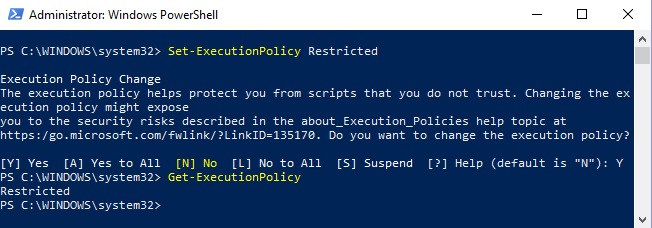
When you've finished running scripts, for security reasons you should change the execution policy to Restricted by again opening PowerShell as Administrator, and entering the following command.
PS C:\> Set-ExecutionPolicy Restricted
After setting the execution policy to Restricted, you can enter the following command to verify that.
PS C:> Get-ExecutionPolicy
More Windows Administration Information:
• View a Brief List of Windows 10's Recent Problems
• PC Technician's Guide to Providing Telephone Support
• How to Create a Bootable USB Drive
• What Are Windows Server Containers?
• How to Change Process Priorities in Windows Task Manager
• Internet Connection Sharing in Windows XP
• Windows Event Logs for Maintaining or Troubleshooting Your PC
• Understanding Windows 7 Security Center
• Firewall Rules
• Use the HOSTS File to Block Web Sites

